
How to Style a Christmas Tree and Avoid Common Decorating Mistakes
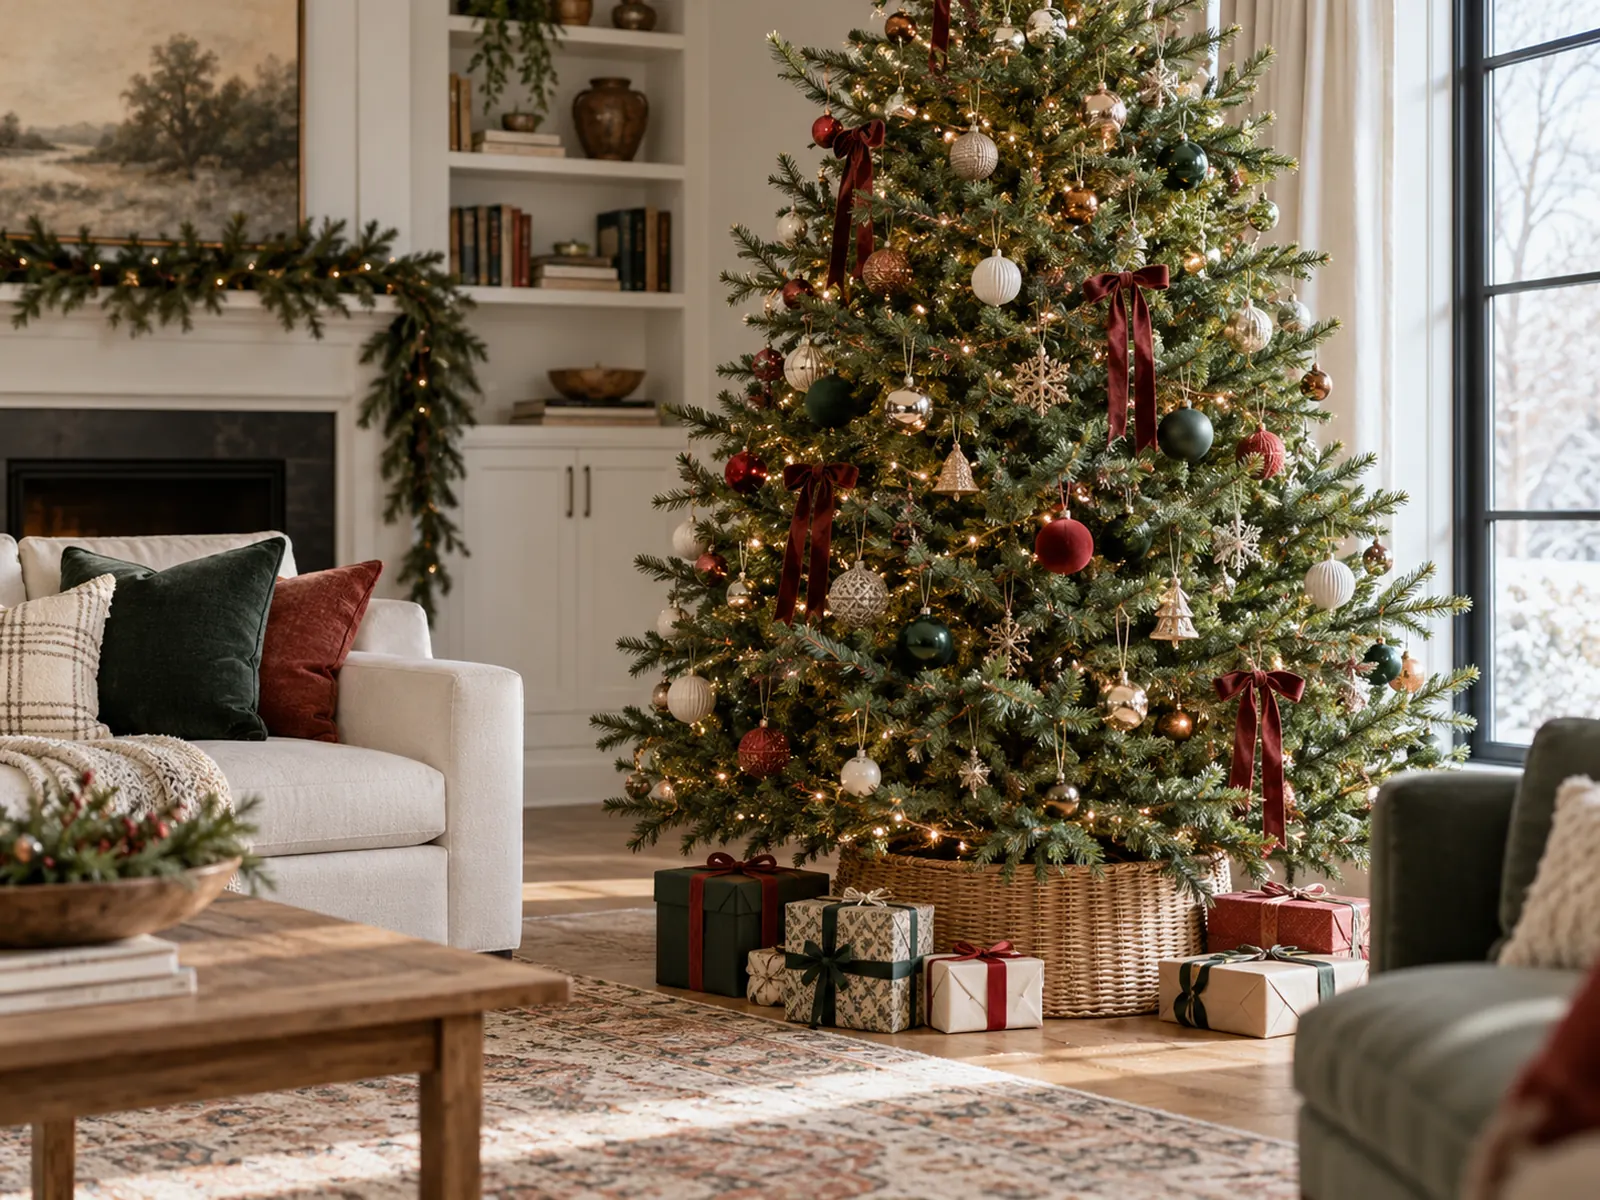
You know that moment where you see a beautifully decorated Christmas tree and it takes your breath away? Well, I have learned over the years that it doesn’t mean spending a fortune on ornaments, it’s how you place them that really counts, making sure to give each ornament or cluster of ornaments enough space to shine. This is how you create something show-stopping.
With that in mind, here’s a quick list of simple tips to help you style your tree with a little more confidence, and to fix the common decorating problems that can make a tree feel unfinished or overcrowded. If you are still deciding on colors and mood, start with our guide to choosing a Christmas decor theme.
1. Set the tree up before you decorate
Choose a spot where the tree can be seen, but where it will not interrupt the main route through the room. Check the tree’s height against the ceiling and leave room for the topper. If you are using an artificial tree, shape the branches before adding lights or ornaments. Take a step back and fill visible gaps by bending individual tips outward and slightly upward.
This post may contain affiliate links.Privacy Policy. Follow us on PINTEREST
For a real tree, use a sturdy stand sized for the trunk and follow the stand and tree-care instructions. Keep the tree away from heat sources and follow current fire-safety guidance for lighting and decorations.
2. Put the lights on first
Test the lights before they go on the tree. Starting near the trunk, weave them in and out through the branches so the glow comes from inside as well as the outer tips. Work in sections and step back every so often to check for dark patches, bright clusters or a visible cord. Distribute the lights before you start hanging ornaments; adding them at the end means reaching around delicate decorations.
If your tree already has lights, check that they are working and spread the branches so the lights are not hidden in dense clumps.
3. Add garland or ribbon with room to breathe
Ribbon can add movement and help connect your colors, but a tight spiral around the tree can look like a candy cane and hide the branches. Try loose vertical drapes, tucked-in loops or short pieces gathered into soft sections. Start near the top and work downward, adjusting the spacing as you go.
If you are using beaded garland or a heavier strand, let it follow the shape of the tree without pulling branches out of place. You do not need to use ribbon and garland and oversized ornaments all at once; choose the layers that make your particular tree feel finished.
4. Place the largest ornaments first
Hang your biggest ornaments before the small ones. Space them around the tree rather than grouping all the statement pieces on the front. Tuck some a little deeper into the branches to create depth, and keep fragile or heavier decorations on sturdier branches.
Then add medium and small ornaments, filling gaps while leaving a little breathing room. If all your ornaments are the same size, the tree can look flat; mixing scales creates a more interesting silhouette. Move around the tree as you work so the back and sides do not end up bare if they are visible from the room.
5. Mix finishes and meaningful pieces
A tree made entirely of shiny balls can feel one-note, even when the color is lovely. Combine a few finishes and shapes: matte and glossy, smooth and textured, traditional baubles and sentimental ornaments. The mix does not have to be perfectly uniform. Repeating a color or material in a few places is usually enough to make the collection feel intentional.
Keep your favorite heirloom, handmade or travel ornaments in the plan. They are often the details that make the tree personal rather than simply coordinated.
6. Finish the top and base
Choose a topper that fits the tree’s proportions. A very large topper can make a short tree look top-heavy, while a tiny one may disappear on a tall, full tree. If the top branches cannot support your chosen piece, use a lighter topper or secure it according to the maker’s instructions.
At the bottom, hide the stand with a tree skirt, collar or a simple fabric wrap that works with the rest of the room. Check that gifts and other decorations do not block a walkway or sit too close to lights or heat.
7. Do the final check from the sofa
When the tree is decorated, turn on the lights and look at it from the places where you usually sit. Check the balance from top to bottom and from side to side. Move a few ornaments if one area feels crowded, add a small piece where there is an obvious gap, and make sure the topper is straight.
Photograph the tree from the main viewing angle. The photo can make uneven spacing or a heavy side easier to spot than looking at the tree up close.
Quick fixes for common Christmas tree decorating problems
- The tree looks crowded: remove a few ornaments or garland sections and let the branches show.
- The tree looks sparse: reshape the branches, add lights deeper inside and use a few larger ornaments to fill visual gaps.
- The colors feel disconnected: repeat your accent color in a few places, then remove pieces that introduce a competing color.
- The tree feels top-heavy: use a smaller topper and move some visual weight toward the lower half.
- The decorations look too uniform: mix sizes, finishes and personal pieces while repeating a limited palette.
There is no single right way to decorate a Christmas tree. Start with the layers that matter to you, leave enough room for each one to show, and make the final adjustments from across the room. For more inspiration, explore our Christmas tree themes for 2026 and our Christmas decor trends for 2026.

Hello, I’m Luci, founder of Mums Make Lists. The site is full of useful and fun ideas for life and seasonal celebrations. Plus a growing selection of instantly downloadable fun printables and party planners. Read more.